These easy Chinese-inspired chive pockets (also known as chive pies or Chinese chive dumplings) are really simple to make. They only require three ingredients for the filling and have an easy dough recipe that is straight forward to follow. They're absolutely delicious and perfect for when you need a tasty snack.

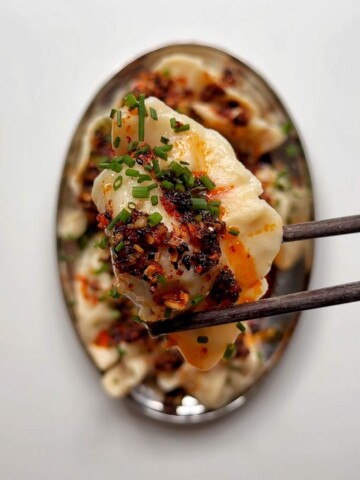
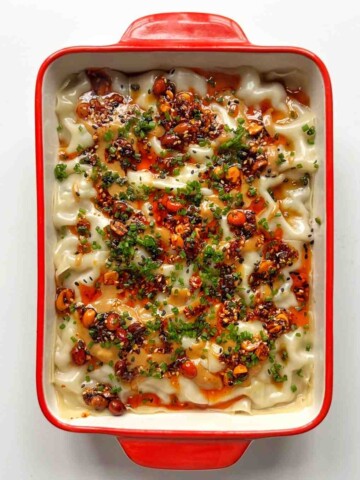
These super easy chive pockets are inspired by the classic Chinese chive dumplings or pies. They're filled with scrambled egg, oyster sauce, and chives. I've paired them with a chilli oil mayonnaise for extra flavour and spice, but you can always eat them alone if you like, they're still super delicious.
I love having snacks in my fridge that I can just heat up whenever I fancy them. In addition to this chive pocket recipe, I love making my Cheat Scallion Buns or my Gochujang Feta Pastries. For a more Indian-style flavour, I also love rustling up my Butter Chicken Crispy Rolls too!
Jump to:
Why You'll Love This Recipe
- 3-Ingredient Filling: There's nothing better than a low-ingredient filling. For this recipe, all you'll need for the filling is some scrambled egg, oyster sauce, and chives. It's surprisingly super flavourful and there's no need to add any other ingredients to it.
- Perfect Snack: I love an easy and simple snack, and that's exactly what these chive pockets are. You can make them ahead of time in batches, keep them in the fridge or the freezer, and then when the time comes, you can place it in the oven to heat up and enjoy with some chilli oil mayonnaise.
- Accessible Ingredients: I adore cooking with asian ingredients, but sometimes they're not very easy to find. Well, you won't have that problem with this recipe. All the ingredients used are available in most general supermarkets, so you'll have little trouble finding the ingredients! The only one that you might find more challenging is the oyster sauce. But that should be widely available in most supermarkets.
If you're looking for more Asian-inspired pockets of joy, then why not try out my Gluten Free Steamed Rice Paper Dumplings, Spicy Ramen Dumplings, or my Coconut Steamed Buns.
Ingredients You'll Need

Plain Flour: Plain flour serves as the base for the dough, providing the structure and texture for the chive pockets. Its neutral flavour allows the chive filling to shine, while its gluten content gives the dough elasticity for easy folding and shaping.
Sesame Oil: Sesame oil adds a distinctive nutty flavour to the chive pocket dough, enhancing the overall taste of the dish. It also provides a slight oily element, allowing the dough to go a wonderful flaky texture when fried.
Sugar: A small amount of sugar is added to balance the flavours in the dough. It helps create a slightly sweet undertone that complements the savoury chive filling without making the pockets overtly sweet.
Eggs: We used 5 eggs in this recipe to make a wonderful scrambled egg. It's silky and velvety, but not too moist. We leave it to cool and then add in the other ingredients.
Oyster Sauce: Oyster sauce imparts a savoury and umami depth to the chive egg filling. Its unique flavour enhances the overall taste profile of the dish, making the chive pockets more robust and satisfying.
Chives: Chives are one of the star ingredients, providing a fresh, onion-like flavour to the filling. They contribute both aroma and a pleasant crunch, making the chive pockets flavourful and texturally interesting.
Ingredient Substitutions
Plain Flour: You could use whole-wheat flour or gluten-free flour for a different texture or dietary requirement.
Sesame Oil: Toasted nut oils like walnut or almond oil can provide a similar nutty flavour. If you have neither of them, then using plain vegetable oil will do to ensure that the pastry is that tiny bit more flaky when cooked.
Sugar: Honey or maple syrup for natural sweetness, or a sugar substitute for a lower-calorie option.
Eggs: If you don't want to use eggs, you can use a mixture of silken and firm tofu to create a similar texture. Simply scramble them in a pan with ½ teaspoon of turmeric and a pinch of black salt for that eggy flavour.
Oyster Sauce: The oyster sauce just acts as a seasoning. So, if you don't have it, feel free to use light soy sauce, sweet chilli sauce, or black bean sauce for a different flavour.
Chives: Green onions, spring onions, or leeks can provide a similar onion-like flavour and texture.
Recipe Variations
Vegan Chive Pockets:
For a plant-based alternative, substitute the eggs with a mixture of scrambled silken and firm tofu fried with plant-based butter, ½ teaspoon turmeric for colour and a pinch of black salt for flavour. Use a vegan oyster sauce or soy sauce, and choose vegan mayonnaise or a cashew-based cream. Follow the original recipe steps, incorporating these vegan-friendly substitutes. The result is a delightful version of the classic chive pockets, perfect for those embracing a plant-based lifestyle. If you're looking for some plant-based snacks, why not try out my Vegan Rice Balls, Vegan Prawn Toast, or Vegan Onigiri.
Meaty Chive Pockets:
If you're craving a heartier option, try adding 150g of cooked and minced chicken or pork to the filling, enhancing the umami flavour with traditional oyster sauce. Keep the eggs for binding and richness, and use regular butter for a savoury, meaty taste. Mix the cooked and minced meat with the chives, oyster sauce, eggs, and other filling ingredients. Proceed with the dough and filling preparation as in the original recipe, ensuring the meat is thoroughly cooked. This version offers a delicious twist for those who enjoy the savoury goodness of meat in their chive pockets. If you fancy more meatier snacks, why not try out my Cheesy 'Nduja Slider, Spicy Tuna Crispy Rice, or my Smash Gyoza.
Step-By-Step Instructions

Step 1: Combine your flour, sesame oil, sugar, and salt in a bowl.

Step 2: Knead your dough for a few minutes. If the dough is sticking to your hands, add a sprinkle more flour.

Step 3: After a couple of minutes kneading, you should have a bouncy but firm dough. Cover with plastic wrap and set it aside.

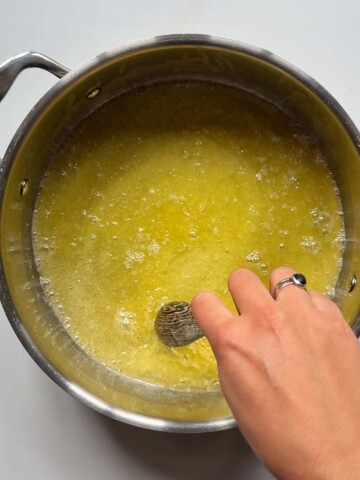
Step 4: Place a frying pan on low-medium heat and add in 1 tablespoon butter. Once melted, crack in your 5 eggs. Scramble until the eggs are cooked through. Then set them aside in a bowl.

Step 5: In your egg bowl. add in your chopped chives, oyster sauce, and 1 teaspoon of ground black pepper. Give it a mix and then set aside.

Step 6: Grab your dough, roll it into a sausage shape, and then slice into 5 equal pieces.

Step 7: Roll each wrapper into thin circles and then place ⅕ of your filling onto one side of the wrapper. Fold over the wrapper and seal.

Step 8: Seal the edge by pinching between your thumb and index finger all the way around the semi-circle.

Step 9: Repeat for all 5 of your chive pockets. If you struggle with the pleating, don't worry, just seal them and begin frying.

Step 10: Place a non-stick pan on low-medium heat and add in a drizzle of vegetable oil. Add in your chive pockets (depending on how big your pan is, you might have to do it in two batches), fry for 4 minutes on each side with the lid of the pan on. Check every minute to ensure the bottoms of the chive pockets don't over cook. Once golden, take off the heat and serve up with your chilli oil mayonnaise.
Top Tips!
- If you want to make your dumpling wrappers completely circular, use a giant cookie cutter, or the upper side of a small-medium sized bowl, place it down onto your wrappers, and cut around the bowl into the dough with a knife.
- Placing the lid on your pan while cooking your chive pockets will create a small oven and do a better deal of cooking the whole pie evenly. Make sure to check the bottom of each pie regularly to ensure they don't burn.
- If you're making chive pockets for more than 5 people, or you want some to put in the freezer, make sure to double up or triple up on the recipe.
What To Do With Leftovers
Storage: To store Chive Pockets, place them in an airtight container or wrap them tightly in plastic wrap. Keep them in the refrigerator for up to 3 days. Ensure they are cooled completely to avoid them getting soggy.
Freezing: Chive Pockets can be frozen for longer-term storage. Arrange them in a single layer on a baking sheet and freeze until solid. Once frozen, transfer them to a freezer-safe bag or container, placing parchment paper between layers to prevent sticking. They can be stored in the freezer for up to 3 months.
Reheating: When ready to enjoy, preheat your oven to 180°C (350°F). Place the frozen or refrigerated Chive Pockets on a baking sheet and heat in the oven for about 10-15 minutes or until they are thoroughly warmed and the crust is crisp. If reheating from frozen, it may take a bit longer. Alternatively, you can reheat them in a microwave, but the oven method is recommended for a crispier texture.
FAQs
Yes, you can! These pockets are perfect for preparation in advance. Follow the whole recipe and cook them fully. Then, when you're ready to eat them, simply reheat them according to the instructions above and enjoy!
Absolutely. Increase the quantities of the ingredients to make a larger batch, and freeze the extra Chive Pies for future meals. Follow the freezing instructions provided to maintain their taste and texture.
Certainly! While the recipe provides a more classic filling, feel free to get creative with the ingredients. You can add shredded chicken, tofu, or different veggies to suit your taste preferences.
You Might Also Like These...


Easy Chive Pockets (Chinese Chive Pies)
Ingredients
For The Dough
- 150g plain flour
- 70 ml hot water
- 1 tablespoon sesame oil
- 1 teaspoon sugar
- 1 teaspoon flaky salt
For The Filling
- 1 tablespoon butter
- 5 eggs
- 1 tablespoon oyster sauce
- 25g fresh chives, chopped
- 1 teaspoon ground black pepper
For The Dipping Sauce
- 1 tablespoon mayonnaise
- 1 teaspoon chilli oil
Instructions
- Combine your flour, sesame oil, sugar, and salt in a bowl.
- Knead your dough for a few minutes. If the dough is sticking to your hands, add a sprinkle more flour.
- After a couple of minutes kneading, you should have a bouncy but firm dough. Cover with plastic wrap and set it aside.
- Place a frying pan on low-medium heat and add in 1 tablespoon butter. Once melted, crack in your 5 eggs. Scramble until the eggs are cooked through. Then set them aside in a bowl.
- In your egg bowl. add in your chopped chives, oyster sauce, and 1 teaspoon of ground black pepper. Give it a mix and then set aside.
- Grab your dough, roll it into a sausage shape, and then slice into 5 equal pieces.
- Roll each wrapper into thin circles (around 3 inches in diameter) and then place ⅕ of your filling onto one side of the wrapper. Fold over the wrapper and seal.
- Seal the edge by pinching between your thumb and index finger all the way around the semi-circle.
- Repeat for all 5 of your chive pockets. If you struggle with the pleating, don't worry, just seal them and begin frying.
- Place a non-stick pan on low-medium heat and add in a drizzle of vegetable oil. Add in your chive pockets (depending on how big your pan is, you might have to do it in two batches), fry for 4 minutes on each side with the lid of the pan on. Check every minute to ensure the bottoms of the chive pockets don't over cook.
- Once golden, take off the heat and serve up with your chilli oil mayonnaise.
Notes
-
- If you want to make your dumpling wrappers completely circular, use a giant cookie cutter, or the upper side of a small-medium sized bowl, place it down onto your wrappers, and cut around the bowl into the dough with a knife.
-
- Placing the lid on your pan while cooking your chive pockets will create a small oven and do a better deal of cooking the whole pie evenly. Make sure to check the bottom of each pie regularly to ensure they don't burn.
-
- If you're making chive pockets for more than 5 people, or you want some to put in the freezer, make sure to double up or triple up on the recipe.

Leave a Reply